Introduction
Cleaning up your individual tracks, in a mix, with equalization is one of the easiest things you can do, but too often, when reviewing my client’s mixes, I notice they are not using surgical or cleaning EQ on every track.
Surgical or cleaning EQ is typically done at the beginning of the FX chain in the track and is not to be confused with coloring EQ and is done by cutting out (filtering) unwanted frequencies.
I would like to preface this in saying all of this tips and tricks that I offer are based on methods that I have learned over the years. Not everyone does things the same way, but for this most part this method will help prepare you for mixing your next track in order to achieve what the professionals are doing.
In today’s lesson I am going to give you an often-overlooked tip that I apply to each and every individual track I mix in a song.
Common EQ Mistakes
Most musicians today, especially starting out, fail to apply one of the most important techniques when cleaning up their audio for mixing and mastering. One of the most fundamental and important aspects when mixing a song, is getting rid of all of the unwanted or unused frequencies for each track in a mix. What this does is frees up those frequencies (cut out of the mix) for other sounds to use (breathe freely), within that specific frequency range, reducing the “muddy” effect that occurs when too many sounds are overlapping or present in a specific frequency. When I say “muddy,” I mean I to say too many sounds or instruments in one area fighting for the listeners ears, resulting in a jumbled mess of too many sounds overlapping, causing a “muddy” mix.
In order to rectify this mud, you must add Low Pass, High Pass and/or Bandpass filter EQs to each and every track in the song or mix. I typically do this at the beginning of my mixing chain. This is a very important and often overlooked trick that new producers or audio engineers typically bypass, either out of ignorance or laziness. Either way, it’s the first thing I do on every track I mix.
Example Mixing Chain
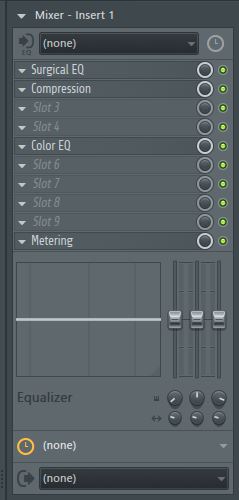
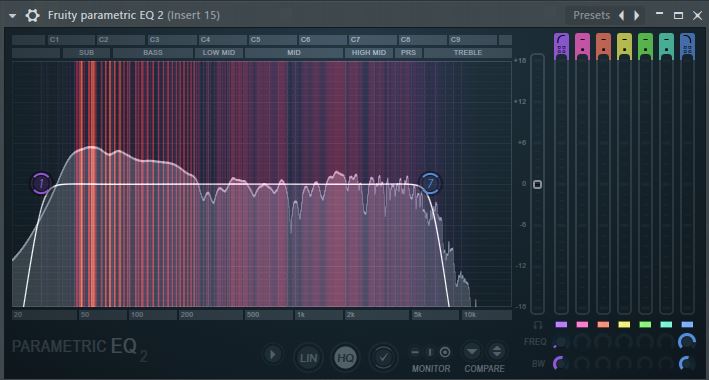
Below are several examples of the types of EQs I use. For the most part I will use some type of Bandpass EQ, which allows me cutting the unwanted frequencies above and below a certain frequency range.
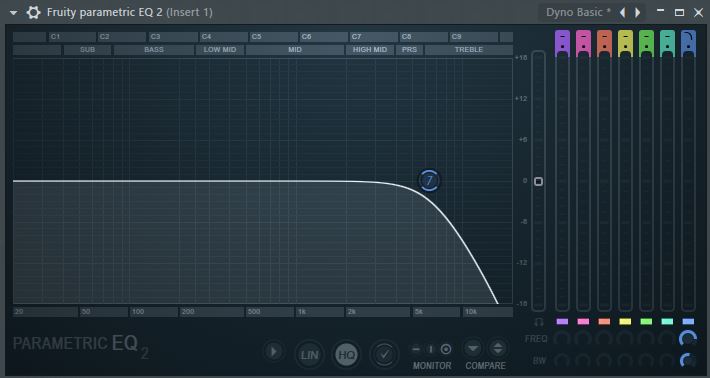
A low pass filter EQ allows everything below the EQ filter to pass through, unaffected by the filter effect.
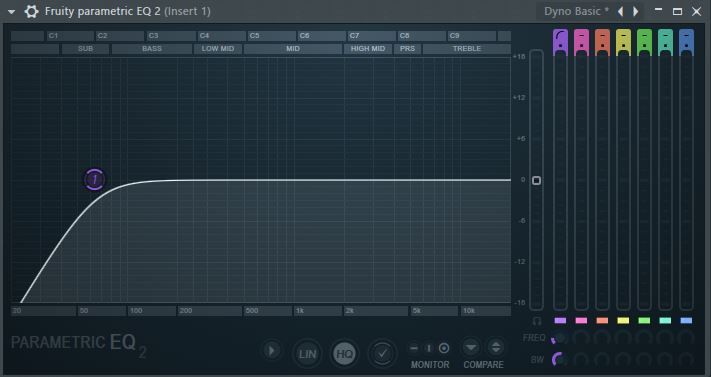
A high pass filter EQ, is the opposite of a low pass filter EQ. A high pass filter EQ allows everything above the filter EQ to pass through unaffected by the filter effect.
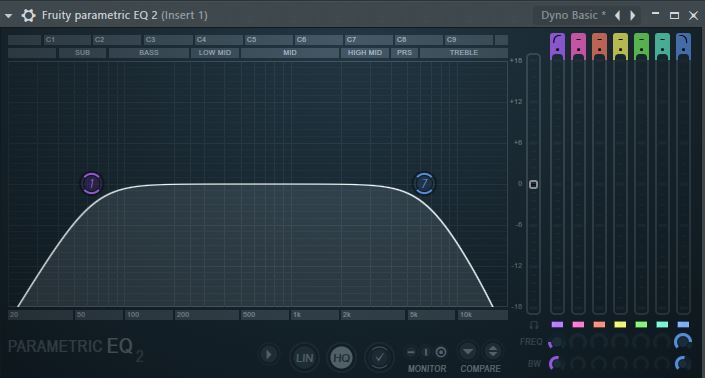
A bandpass filter EQ is a combination of both the low pass and high pass filter EQs, where everything in-between the low pass and the high pass filter EQs is unaffected by the filter effect.
Fundamental range of a sound
Every sound has a specific fundamental frequency presence. This is the area at which that sound is most present or, in mixing terms, most “meaty” or the “meat of the sound”. This is also where you should focus when mixing it, by boosting and reducing the frequencies within this “fundamental range,” removing unwanted frequencies above and below this range. Frequencies outside this range, are typically useless frequencies that are often not heard or present in the mix and will compete with other tracks and sounds that may or may not overlap these frequencies. This is especially important in the low end where there is a lot of sound pressure that builds up causing a reduction in volume.
Excess Baggage (Weight in a mix)
The more layers overlapping in a frequency range equal more weight, more weight means more mud, which brings the volume down. By removing the unwanted frequencies, you free up space, reducing the weight holding each sound/instrument down, which actually increases the volume or increase the available headroom of your mix, once that space is freed.
Even if you don’t want to add FX to an instrument or individual track in your mix, you should still apply this type of EQ. This will further clean up the headroom of your mix allowing the other instruments to shine.
It’s important to understand, these techniques can be applied to any genre of music. Don’t get caught up trying to replicate the settings I use, just make sure you understand that you need to clean up the unwanted frequencies in every track that you mix, to free up space for other tracks to use.
Put Into Practice
Add some kind of spectrum frequency analyzer on the channel (near the end of the chain), so that you can monitor which frequencies you want to keep and which frequencies you want to remove. Then remove the unwanted frequencies above and below where the fundamentals of the sound occur, freeing up space for the other instruments to shine.
Special note, even if you have done a preliminary volume mix of your tracks, after applying this cleaning EQ, your volume level might change slightly, almost always louder. This is because you have removed the unwanted weight, weighing your individual tracks down.
Below are some examples of me applying this technique to a song mix.
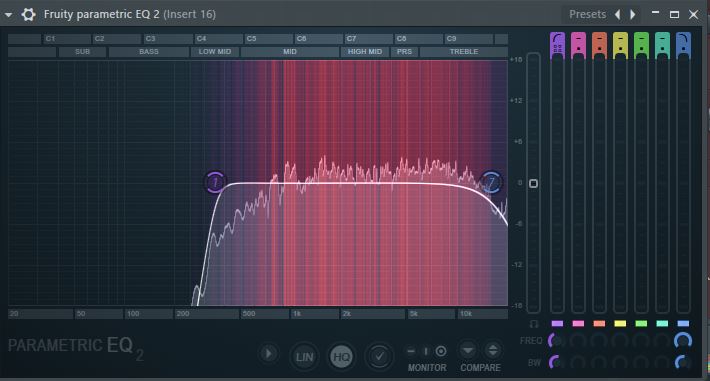

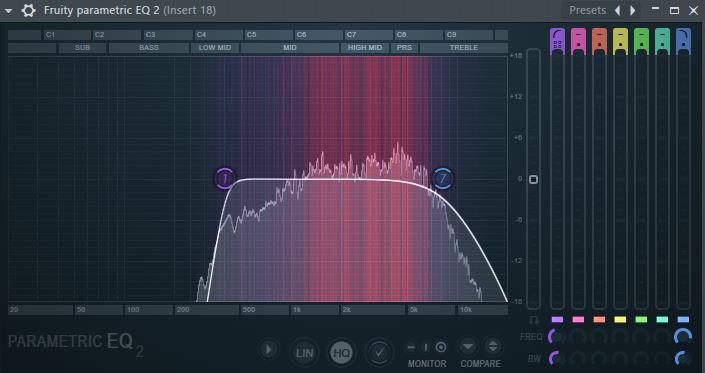
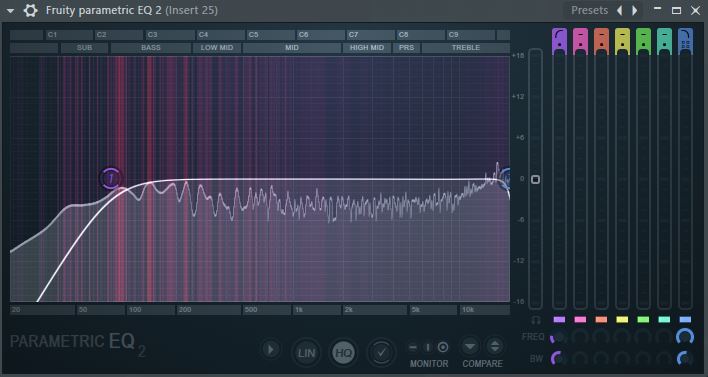
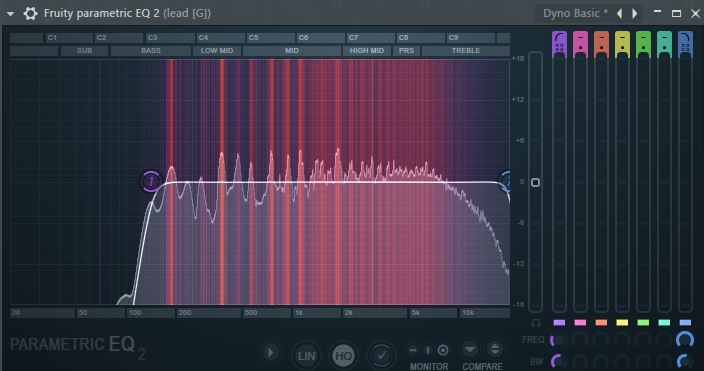
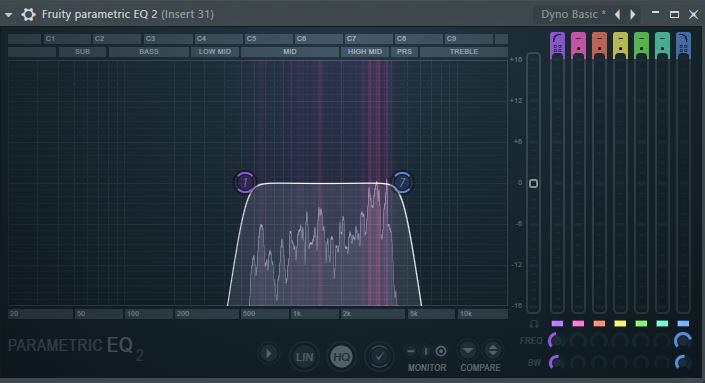
This is not the only EQ that I add to these tracks, but this should at least give you an idea of what I typically do to clean things up in a mix. This will guarantee I free up headroom space headroom in my mix, which will allow each and every instrument ample space to breathe (be heard).
I promise you, if you put this simple, yet effective technique into practice each and every time you mix a song, the end results of each instrument will be cleaner, which will allow you to have more headroom in your mix which will result in a louder more dynamic mix. This will allow the mastering engineer to push the volume of your mix, louder than ever before.
Hope this helps someone out there… in search of the perfect mix!


Leave a Reply