
Introduction
A simple and easy, effective way to fatten up a sound, track or mix using a low ms delay, called “Doubling”. I will be showing you that using a delay with lower time settings, can create interesting amplification to a sound, without introducing saturation or distortion.
Application Of Technique
I typically use this technique when mixing my drums, especially on the upper frequency sounds (i.e., snare drums, hats, rides, crashes, etc.). I might also use this on vocals, lead synths, Dubstep growls or even on guitars. You can use this technique on any sound you wish to amplify without introducing distortion or saturation. Just make sure to use a lower ms setting on your delay, and don’t forget to experiment and have fun.
A Reminder
This technique is not a “one size fits all” kind of approach, be sure and play around with your ms settings as each instrument track will be different.
Keep Settings Low
It’s important to note, to be careful to keep your settings low, too much will cause a typical delay in the sound. So, unless you are going for that, it’s best to be conservative with your settings.
But if done right, you will create a slightly offset, slap back, doubling of the sound that appears to the listener as wider and louder, essentially making it appear louder or fuller.
Put Into Practice
One of the easiest things you can do to get that professional, wide (“PHAT”) sound, is to use a low ms (millisecond) delay FX plugin on a track or sound. Below are several audio examples of this. These should help you gain an understanding of how easy this tip/trick can be.
Each individual sound will differ as to how much “Doubling” you apply, keep this in mind when adding this effect to your tracks or sounds, as there is no one size fits all kind of approach here but it’s best to keep things simple.
It’s very important that you use a delay that has the capability of converting the delay time into milliseconds and can filter out frequencies above and below the threshold.
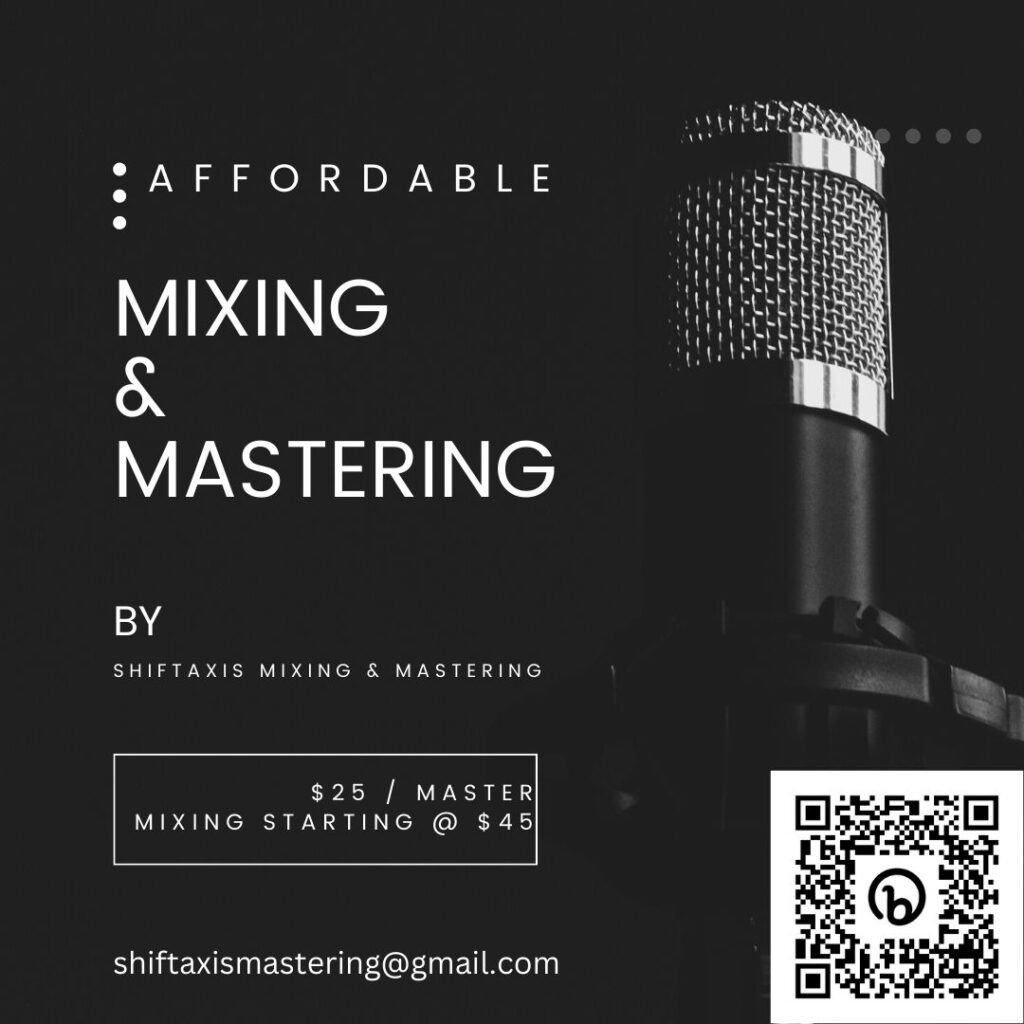
Which Plugins Do I USE?
When it comes to delays, I typically use the stock plugins in FL Studio, Ableton Live, Logic Pro or Reason, however I my go-to delay is Native Instruments Replika (pictured above).
Most stock delay plugins that come with all the DAWS (Digital Audio Workstations) these days, typically have a delay plugin that is capable of converting it’s time to ms. This allows for more fine-tuning control over the effect.
There are plenty free and paid delay plugins out there, you can search your favorite search engine, otherwise use your stock plugins that come with your chosen DAW. Keep in mind it’s more about the skill of the producer and his/her technique, than which plugin was used.

I found this plugin for free from Valhalla DSP (Valhalla Supermassive).
It’s also important to note that the delay plugin is best to have the ms (time), mix (wet/dry) and filter EQ (HP, BP or LP) options to get the most natural effect possible.
Reduce Unwanted Frequencies
Cleaning your sounds and tracks, ridding them of unwanted frequencies is an extremely helpful technique everyone should apply to their mixes and sounds. I wrote on this in detail in another article. You can read more about that here Cleaning Audio With EQ
What Does It Sound Like?
I took a Dubstep drum beat loop that I made for a track of mine. Added the Native instruments Replika delay, adjusted the mix (wet/dry) setting and set the low cut to 120Hz (to leave the low-end sub and meat frequencies of the kick unaffected). Then I adjusted the ms and feedback settings to taste. Below are three examples of those time adjustments.
Dubstep Drum Example
All audio used in this example was recorded in OGG lossy format to conserve space on this hosting account. The lower, lossy quality will not hinder the point I am trying to get across in any way.
Dubstep Drum Loop | Dry (no delay)
Dubstep Drum Loop | Natural Doubling
Dubstep Drum Loop | Extreme Doubling
Vocal Loop Example
In this example I took a random vocal one shot that came stock with FL Studio. I added the Native instruments Replika delay, adjusted the mix and set the low cut to 65Hz (to leave the low-end sub frequencies unaffected). Then I adjusted the ms setting to taste. Below are three examples of those time adjustments. I tend to set higher values in ms for my vocals.
Vocal One Shot | Dry (no delay)
Vocal One Shot | Natural Doubling
Vocal One Shot | More Extreme Doubling
Dubstep Growl
In this example I took a Dubstep Growl that I made using Serum (VST) from Xfer Records. I added the Native Instruments Replika delay, adjusted the mix and set the low cut to 65Hz (to leave the low-end sub frequencies unaffected). Then I adjusted the ms setting to taste. Below are three examples of those time adjustments. I tend to set my Dubstep growls to higher doubling settings.
Dubstep Growl | Dry (no delay)
Dubstep Growl | Natural Doubling
Dubstep Growl | More Extreme Doubling
In Summary
Hopefully after reading this, you are better able to understand what I mean when I say this is a great tool that all producers and engineers can use when working with sound, especially when they need a little fatter sound in the mix without added saturation or distortion. Try not to limit yourself and remember it’s more about the producer and technique than buying the most expensive plugins, this I can guarantee!
Hope this helps someone out there… in search of the ever-elusive perfect mix!


Leave a Reply